

")


Terug van weg geweest :) |
Reageer 
|
| Autheur | |
Talletje 
Groupie 

Lid sinds: 10 Oktober 2011 Locatie: Netherlands Status: Offline Points: 53 |
 Post Options Post Options
") Thanks(0) Thanks(0)
 Citeer Reply Citeer Reply
 Onderwerp: Terug van weg geweest :) Onderwerp: Terug van weg geweest :)Posted: 09 April 2013 om 10:41 |
|
Lieve mede hobbyers,
Na lange afwezigheid ben ik blij te zeggen dat ik weer aan het haken geslagen ben.
Helaas was mijn situatie voor mij onhandelbaar geworden (ik ben zelf 24 heb een kleine meid van 1 1/2, huishouden, extreem grote verbouwing, werken op vrij/za/zo van 4 tot 13.00, de administratie prive en zakelijk van de zaak van mijn partner, en je relatie proberen te behouden..) en ben ik uiteindelijk opgenomen voor 2 weken om mezelf weer terug te vinden.. mijn rust en mijn haken heb ik daar weer terug gevonden
Ik heb aardig wat projectjes gehad tijdens mijn opname en ik zaL die foto's eerdaags ook eens posten.
Mijn meisje was goed opgevangen door iedereen om ons heen (ze zit nu lekker bij me te kroelen :)) en toen ze thuis kwam lag er een arsenaal aan zelfgemaakte cadeau's van mama
Nu heb ik wel meteen een vraagje aan jullie, ik heb een superleuk patroontje gevonden van een luier stacker... na 80 x proberen kom ik er nog niet uit, als ik zelf het patroon vertaal loop ik bij de bodem al vast... het patroon zegt op een gegeven moment 8 x herhalen..... als ik dat doe hou ik een stuk over als ik ga keren ( een staartje zeg maar...) ik hoop dat jullie mij op weg kunnen helpen...misschien wil iemand het eerste gedeelte voor mij vertalen?
ik post het hele patroon hieronder en onderstreep wat ik net beschreef waar ik volgens mij de fout inga....maar misschien wil iemand dus alleen de bodem voor mij vertalen....
Liefs Talletje
Supplies: At least one skein worsted weight yarn. (I used Red Heart Super Saver, Black) 6mm (J/10) hook Yarn needle Decorations or appliques Opt - Square of heavy cardboard cut to fit the bottom of the stacker Abbreviations: Ch – chain Dc – double crochet Sc – single crochet Sl st – slip stitch Dc dec – double crochet decrease Sc dec – single crochet decrease St – stitch (in this case, either sc or dc) Bottom: (note - this bottom is very stretchy. Though it is not pictured, doing 25 rows of 30 or so single crochets would be much sturdier.) Ch 35 Row 1: Dc in 6th ch from hook. *Ch 1. Skip one ch, dc. Repeat from * across. Row 2: Ch 3, turn. Dc in ch space between dcs. *Ch 1. Dc in next space between dcs. Repeat from * 8 times. Dc in next ch (for the rest of the pattern, in top ch of ch 3). Row 3: Ch 4, turn. Dc in ch space between dcs. *Ch 1. Dc in next space between dcs. Repeat from * 7 times. Ch 1, dc in next ch. Row 4 – 12: Repeat Rows 2 and 3. End with row 2. Finish off. 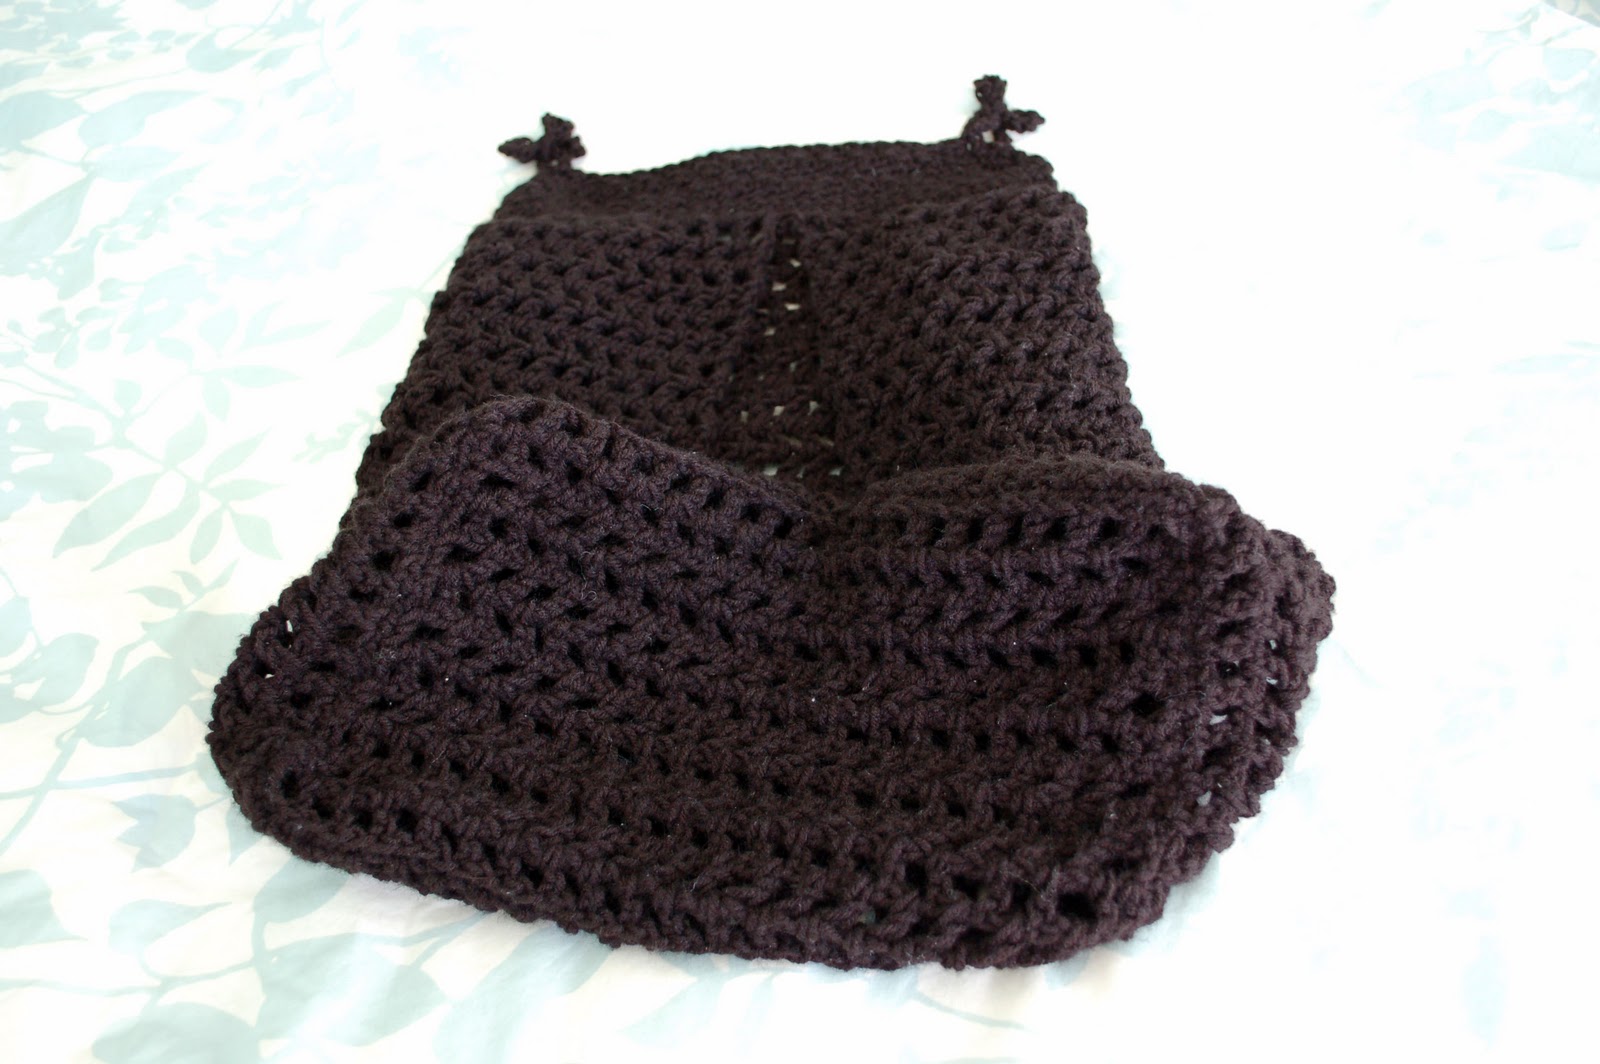 Sides: Side Row 1: With wrong side facing, join yarn to the center dc of the beginning chain of the bottom square, working in front loops only, sc around the entire square. Do not join. Side Row 2: Ch 4, turn. Dc in second sc. *Ch 1. Skip one sc, dc. Repeat from * around. If you end up with an odd number, ch 1 and dc in the last sc. Row 3: Ch 3, turn. Dc in ch space between the dcs. *Ch 1. Dc in next space between dcs. Repeat from * in each space around. Dc in top of ch 3. Side Row 4: Ch 4, turn. Dc in ch space between dcs. *Ch 1. Dc in next space between dcs. Repeat from *in each space around. Ch 1. Dc in next ch. Side Row 5 - 12: Repeat rows 3 and 4. At the end of row 12, finish off. (note - stacker pictured has 25 rows, but when in use it stretches to about twice its original size, so I cut down the number of rows in the pattern.) Top: Count 9 spaces in on each front flap of Side Row 25. Mark the spaces with stitch markers. Then count 18 spaces on the back, holding your fingers in the spaces while you count the spaces on each side. Find the back 18 by moving your fingers until the right and left sides have the same amount of spaces between the back 18 and the two front nines. Using stitch markers with closures (or safety pins), clip the corner spaces together. Pleat the left and right sides in. Attach the yarn to the corner with the back side facing. Insert hook through corner space and first space on each side of the pleat (through four layers), (sl st, ch 1) two times. Insert the hook into the next space through all four layers, (sl st, ch 1) two times. Continue along in the same way until the pleat runs out. Then you will just go through two layers. When the front-side flap runs out, pick up the other front-side flap and insert hook through two layers. Watch for when you need to pick the pleat up on the other side, inserting through four layers again. Continue repeating *(sl st, ch 1) two times in each space* until the end. Ch 1, turn. 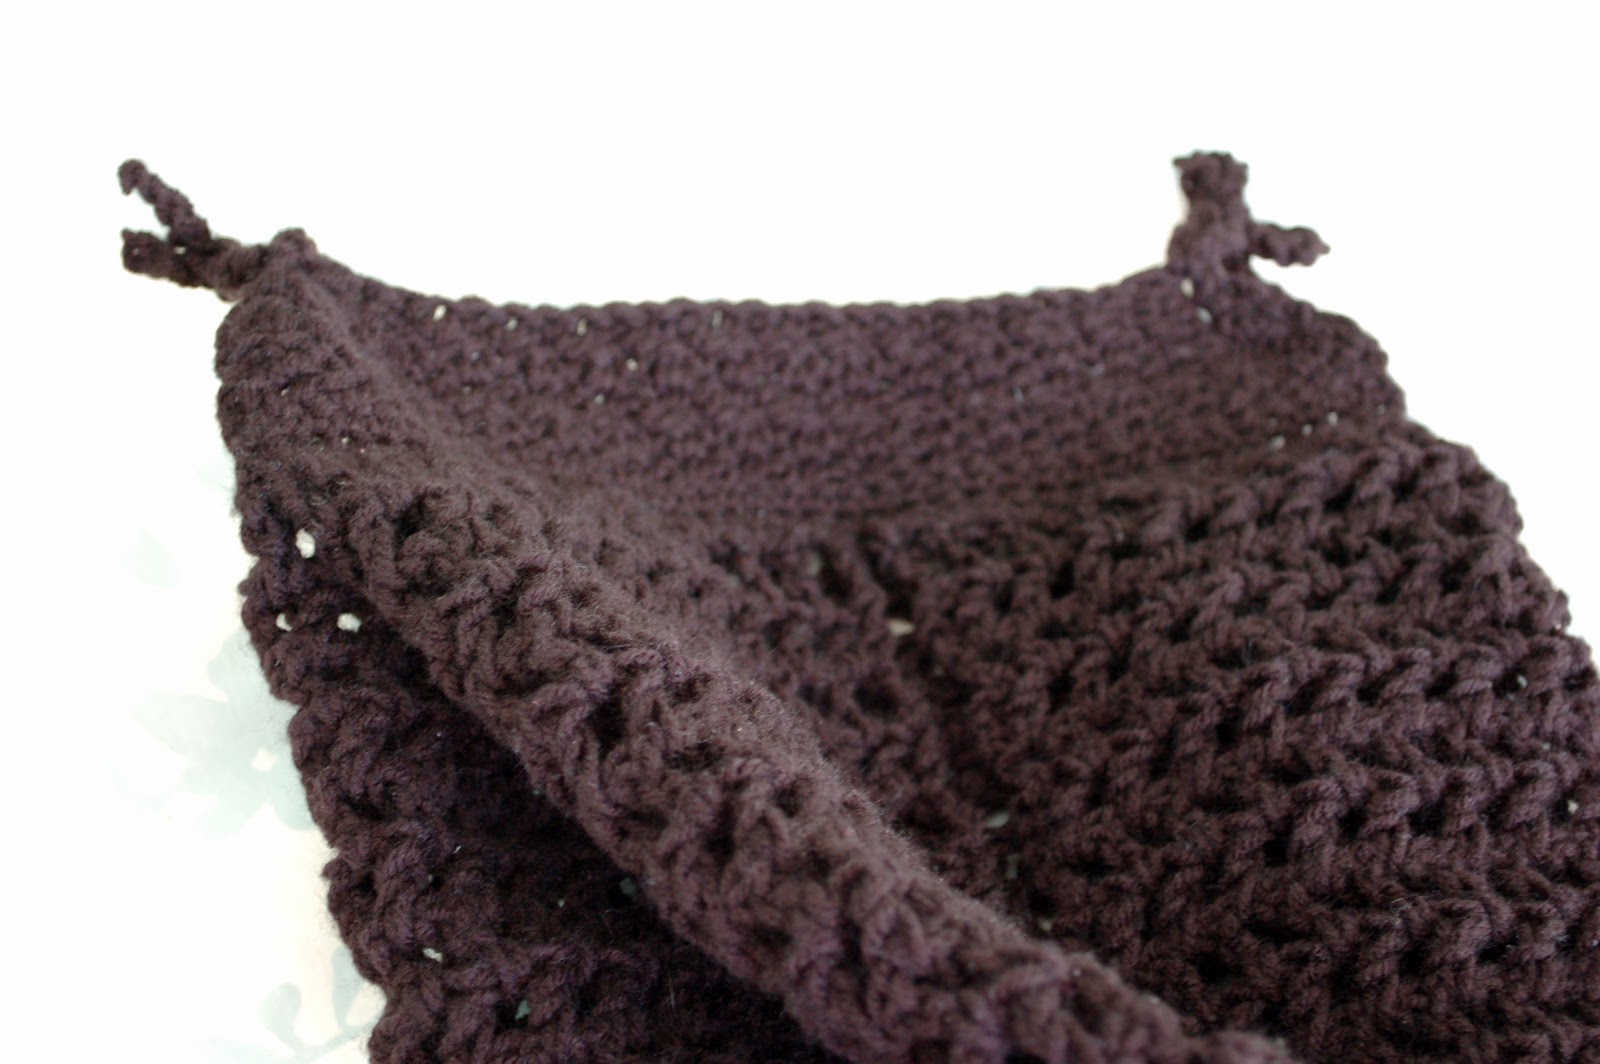 Top row 1: Sc in the ch 1s (I think. I was working with black yarn, at night, which is so hard to see, so I really don’t know where I was inserting my hook, except to say I was always inserting through two strands of yarn, about twice per space from the side rows. It’s important to insert through two strands of yarn, since this will be weight-bearing.) (36 sc) (I ended up with more, but it won’t matter for the rest of the pattern.) Ch 1, turn. Top row 2: Sc in each sc across. (36 sc) Ch 2, turn. Top row 3: *Dc in first sc, sc in next sc* across to the end. (If you had an odd number of stitches, either add (dc, sc in the same sc) or skip (either just skip a sc or do a decrease) to make it an even number. Eyeball it as to which you should do to make the top more the same width as the bottom.) Ch 2, turn. Top row 4*Dc in first sc, sc in next sc* across to the end. Top row 5: Dc dec in first two st. Sc dec in next two st. *Dc in next st, sc in next st* across 14 times or until you have 4 st left. Dc dec in next two st. Sc dec in last two st. Ch 2, turn. Top row 6: Dc dec in first two st. Sc dec in next two st. *Dc in next st, sc in next st* across 12 times or until you have 4 st left. Dc dec in next two st. Sc dec in last two st. Ch 2, turn. Top row 7: Dc dec in first two st. Sc dec in next two st. *Dc in next st, sc in next st* across 10 times or until you have 4 st left. Dc dec in next two st. Sc dec in last two st. (At this point, I was running low on yarn, so I decided to stop. You could keep going in the same way to make more of a rounded shape and have more room to decorate, if you want. ) Attachments: Continuing from Top row 7, *ch 15. Finish off. Attach in same st, ch 15. Finish off.* On opposite corner, repeat from * to *.  Finishing: Weave in all ends. Decorate with appliques. I used the trailing leaves pattern from The Hook Hound, my Tulip-like flower and my Five-Petal flower. Be sure to sew them on loosely - with plenty of room to stretch. The weight of the diapers will stretch the stacker quite a bit. Optional: Cut a piece of heavy cardboard to fit the bottom of the stacker. This will give shape to the bottom, like a store-bought stacker, but I chose not to use it in mine, so that the stacker hugs the diapers better. Pictured below is the stacker loaded with size 5 diapers |
|
|
Groetjes Talletje
|
|
 |
|
|
breienmaar
Hobbyguru 

Lid sinds: 07 Juli 2012 Locatie: noordwijk Status: Offline Points: 5582 |
Post Options
Thanks(0)
Citeer Reply
Posted: 09 April 2013 om 12:26 |
|
Hoi, wel,om terug!
Helaas van pztroon geen kaas gegeten, Leuk dat je weer aan t haken bent! Al is de reden minder,veel sterkte! |
|
|
|
 Onderwerp opties
|
Reageer
|
|
| Tweet |
| Forum Jump | Forum Permissions Je niet post new topics in this forum Je niet reply to topics in this forum Je niet delete your posts in this forum Je niet edit your posts in this forum Je niet create polls in this forum Je niet vote in polls in this forum |
Forum Software by Web Wiz Forums® version 12.05
Copyright ©2001-2022 Web Wiz Ltd.
Deze pagina werd gegenereerd in 0.313 seconden.
Copyright ©2001-2022 Web Wiz Ltd.
Deze pagina werd gegenereerd in 0.313 seconden.